用户手册
时间编码
What is Timecode
Timecode or DVS (Digital Vinyl System) is a special audio signal recorded on a standard vinyl record or audio CD that allows the use of traditional vinyl or non-MIDI capable CD decks to control song playback in VirtualDJ.
VirtualDJ 'listens' to the audio signal coming from the timecode record/CD playing on the vinyl/CD deck and can determine the song position, what speed it's playing at and which direction, allowing this to be replicated on the virtual decks in VirtualDJ. Turntables with timecoded vinyl and CD players with timecoded CDs can be used to control the VirtualDJ decks.
The timecoded CD signal can be downloaded and burnt to disc or you can purchase vinyl timecode:
Supported Timecode Formats
VirtualDJ also supports legacy versions of our very own timecode engine as well as additional 3rd party CD & Vinyl Timecode formats for your convenience:
- VirtualDJ
- Serato
- VirtualDJ
- Serato CV2 & CV2.5
- Traktor MK1 & MK2
- Mixvibes & Mixvibes 7 inch
Different Timecode systems and compatibility
Compatibility between different timecode systems is not guaranteed. Every DJ software with timecode support can have its own timecode. However, unlike other DJ software that can only use one type of timecode signal, VirtualDJ (in addition to its own timecode media) is also compatible with most of the popular timecode systems including Serato and Traktor timecode vinyl and CDs.
It is important that the correct timecode type is selected from the Timecode dropdown menu (depending on the loaded timecode media), otherwise the timecode reading and decoding will be incorrect and will not function as expected.
Timecode Modes
VirtualDJ supports the two main timecode modes as found in most timecode systems.
But there is also a unique mode in VirtualDJ called “Smart Mode” which is the default mode.
- In Absolute mode the timecode player (turntable or cd) is the “master” and VirtualDJ responds to playback position changes (needle drop), pitch changes and scratches when performed from the timecode player (Timecode Vinyl or CD).
Pitch change and Sync from the software are not allowed in this mode. However VirtualDJ switches automatically to the more flexible ‘Smart mode’ when loops or HotCues are performed from the software or the Timecode media, and it switches back to Absolute mode when the timecode media restarts from the beginning. - In Relative mode VirtualDJ does not respond to playback position changes (needle drop) The track just pauses when the timecode stops, and it starts again when there is timecode signal in the soundcard’s inputs (Play/pause).
VirtualDJ still responds to pitch changes and scratches when performed from the timecode player but not in loops and HotCues. However Sync, loops and hot cues work perfectly when performed from the software.
Pitch change and Sync from the software are not allowed in this mode. - The Smart mode is the default and preferred mode in VirtualDJ because it combines the best of the absolute and relative modes. VirtualDJ responds to playback position changes (needle drop), pitch changes, scratch, Sync, HotCues and Loops when performed from either the timecode player or the software.
Starting the timecode from the beginning also restarts the loaded track in VirtualDJ. Unless there are specific needs, smart mode should be the preferred mode for most users.
VirtualDJ allows up to 8 Timecode inputs and timecode controlled decks at the same time if the audio card has the required inputs and outputs channels. However, a typical Timecode setup will include 2 timecode inputs. A multi-channel USB sound card with at least 4 Outputs and 4 Inputs is required. For Timecode vinyl a soundcard designed with phono preamps and able to provide a stereo signal on the appropriate input channels is required. Mono input of a timecode signal is not supported.
Tip: Timecode input numbers are linked with the VirtualDJ deck numbers. To assign a Timecode control to deck 3 and 4 (when a 4 deck skin is used), timecode inputs 3 and 4 must be used. However, these timecode inputs can be assigned to any available physical soundcard input.
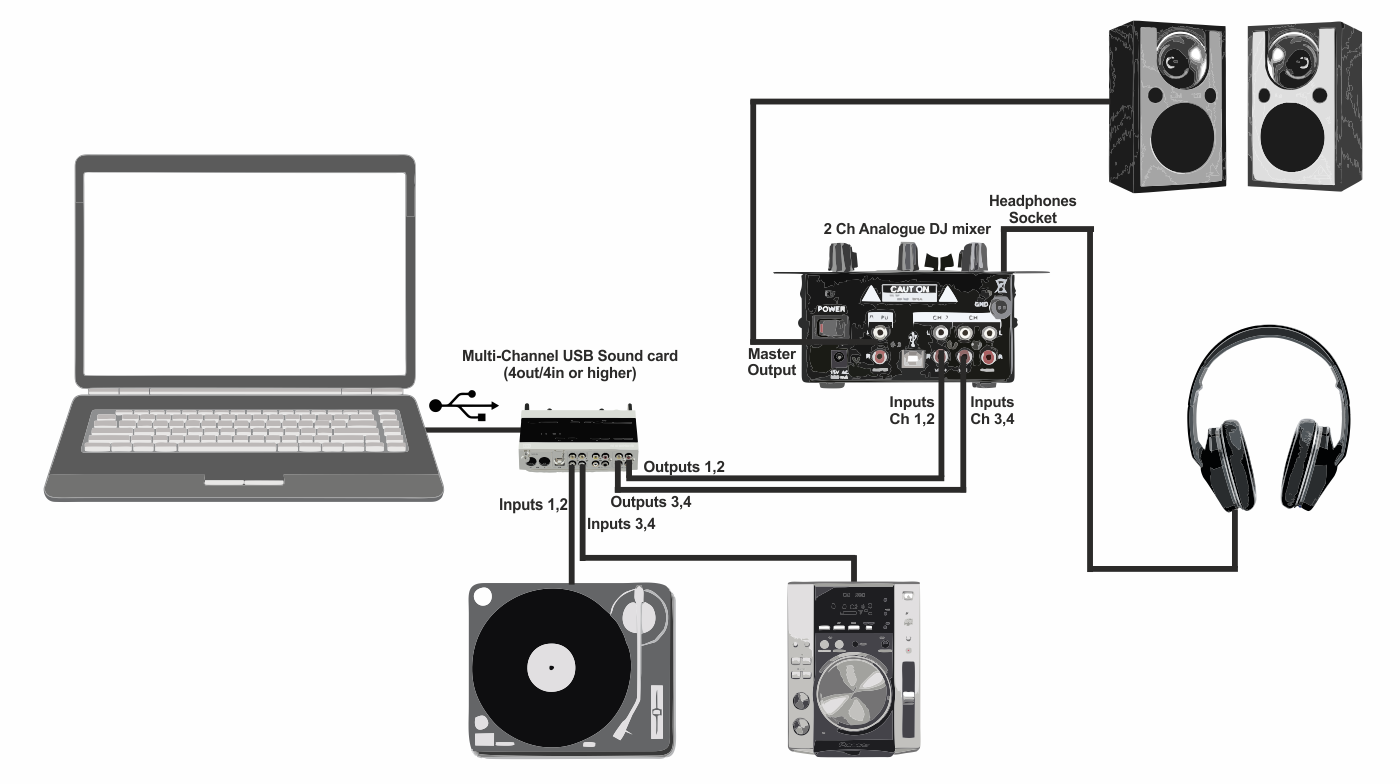
Connect Outputs 1 & 2 and Outputs 3 & 4 of the external sound card to Inputs 1 & 2 and Inputs 3 & 4 of the analog mixer. The mixer's inputs need to be set to Line-In.
Connect Inputs 1 & 2 of the External SoundCard to the outputs of the turntable that will be controlling Deck 1 (Left side). Connect Inputs 3 & 4 of the External SoundCard to the outputs of the turntable that will be controlling Deck 2 (Right side). The sound card’s inputs need to be set to Phono.
Headphone and Speaker connections will be made at the appropriate places on the mixer itself.
In the case where set-up is not obvious, consult the appropriate documentation for the turntable, sound card and/or the mixer to ensure the proper connections are made.
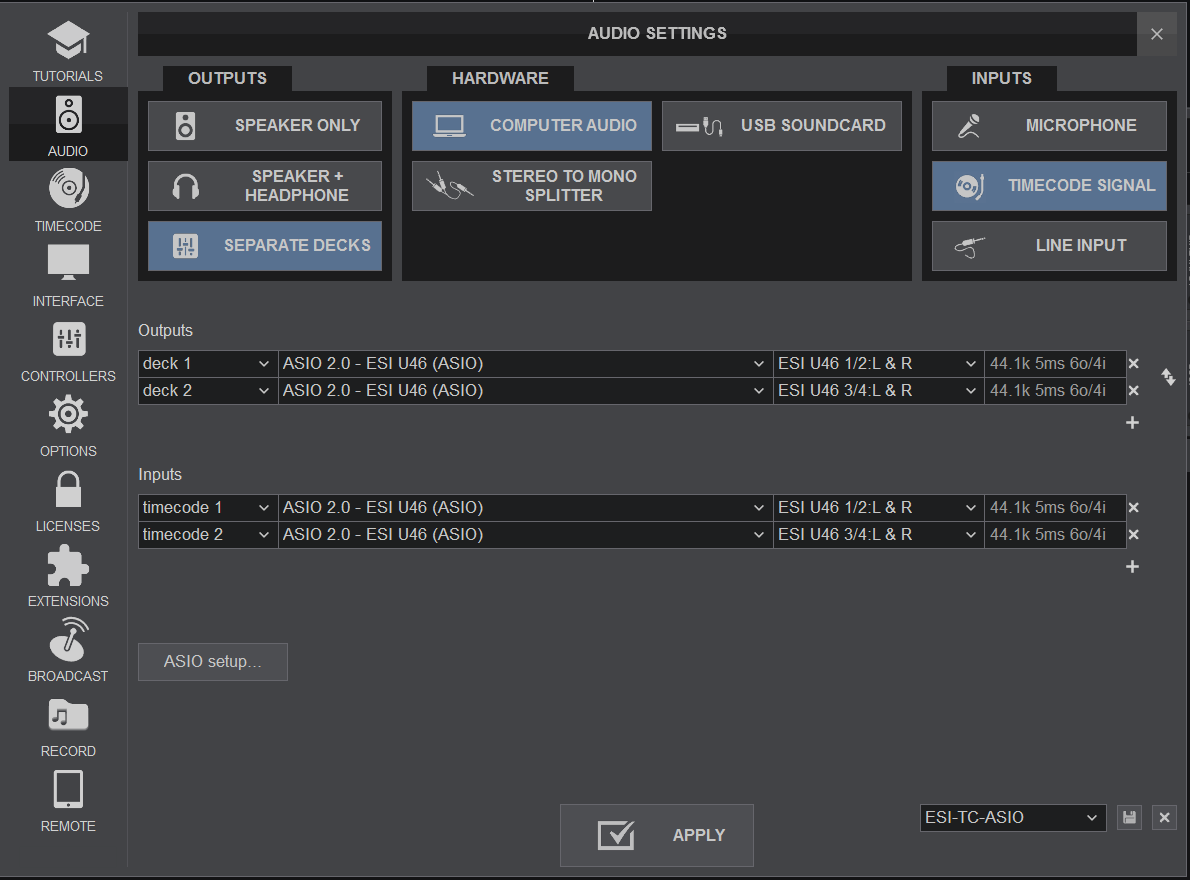
Select SEPARATE DECKS from the OUTPUT options, the Multi-Channel Soundcard to be used from the HARDWARE options and TIMECODE from the INPUT options. Not all cards will be detected in the HARDWARE options by VirtualDJ, but can still be used. If this is the case, use COMPUTER AUDIO from the HARDWARE Options. Once the Audio Setup is created select the multi-channel USB soundcard from the SoundCard field as well as assign the channels for all Inputs and Outputs. Click APPLY to save these changes.
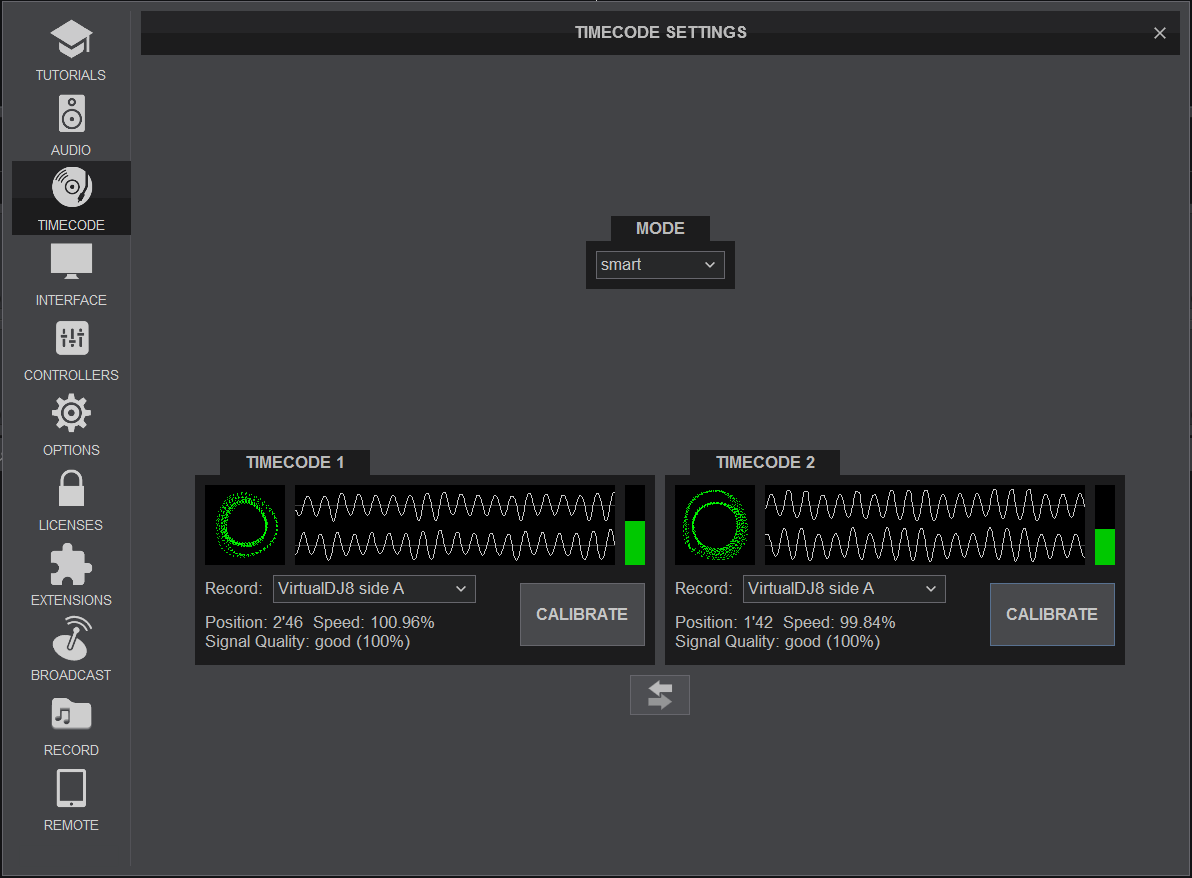
Once the Audio Setup with the Timecode Inputs is applied, an additional tab in the Settings will be available. Click on the TIMECODE tab to open the Timecode settings window.
VirtualDJ will auto-detect the Timecode being used and is auto-configured so there will be very few things to modify. In the rare case that the Timecode is not auto-detected, choose the type of Timecode from the drop down menu and VirtualDJ will auto-configure the necessary settings. Ensure that the Turntable or the CD player is running/spinning at the time of configuration.
Choose the timecode mode (Smart, Absolute, and Relative) depending on preference.
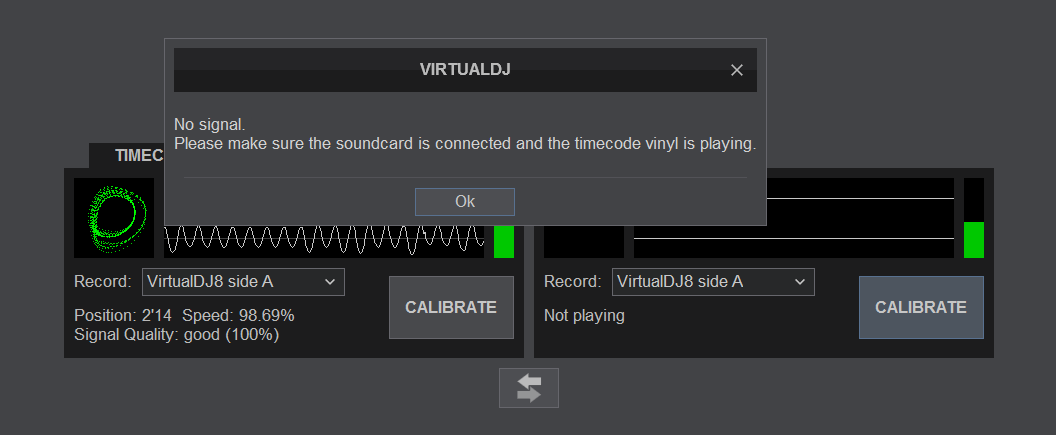
If a “no signal” or “timecode signal lost“ message pops-up, click on the CALIBRATE button to automatically detect the type of timecode after correcting any hardware related (stereo cable inverted, needle wired backwards, timecode not playing, cable disconnected, etc).
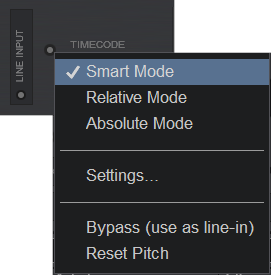
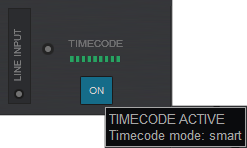
monitoring timecode signal
Clicking on the toggle button will rotate through the selections chosen.
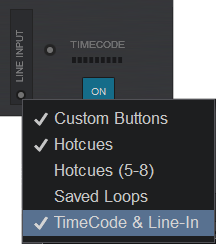
Additionally, the options to open the Timecode Settings window, Bypass the timecode signal (use as a line-in) and reset the pitch on the deck are available for easy access.