Interface - Top Section - Application Controls
Event Scheduler
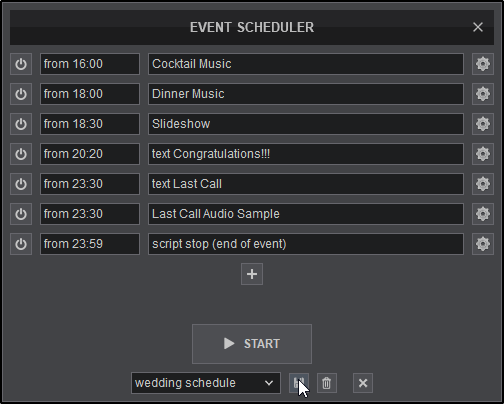
The Event Scheduler provides an easy to use interface that will automate VirtualDJ functions in sequential order based on time. This feature is used to automatically start and or/stop predetermined events such as playing a playlist or sample, adding text or a slideshow to the screen, or even using VDJScript for more complex event actions.

- START/STOP (Single Event). Starts and or stops an event immediately.
- TIMELINE. Displays when an event will start either based on duration or at a specific time on the clock.
- EVENT NAME. Displays the event scheduled (can be customized).
- EDIT. Opens the specific event in order to edit it's properties.
- ADD. Opens the ADD EVENT ITEM menu where individual event items can be created.
- START/STOP. Starts or stops the entire Event Scheduler
- EVENT MANAGER. Provides the ability to save an Event Schedule by adding a name into the text box and clicking the save icon. Using the drop down provides access to select any previously created events that have been saved. Clicking on the trash can icon will delete the event that is in focus (selected).
- CLEAR. Removes all events from the Event Scheduler to start with an empty list.
 2. Click on the button in the center of the Event Scheduler to create your first event.
 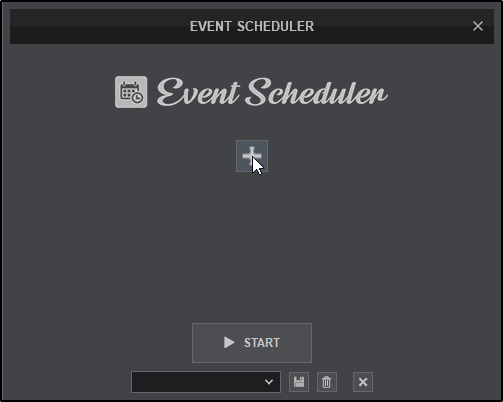 3. Select an action to perform. Actions can be as simple as playing a file or sample, or adding text or a slideshow to the screen. Using VDJscript actions is also a possibility.
 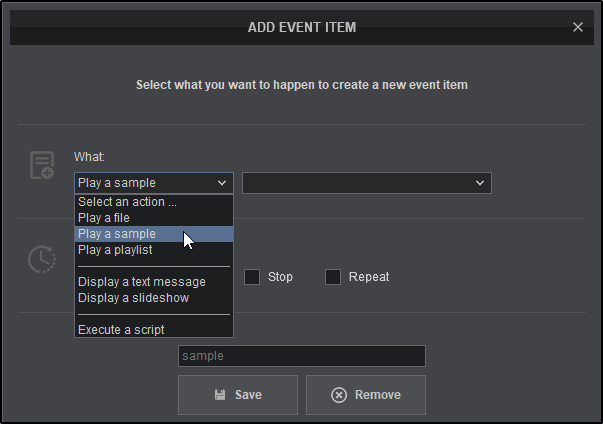 4. In this example Play a sample has been chosen. Use the box to the left to choose which sample will be played.
 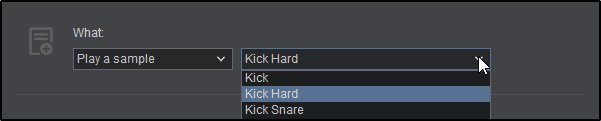 5. After the action is selected (the What), it's time to select when the action will take place. This can be a specified interval or at a specific time. Click on the dropdown menu to select After to input a duration in seconds (s) or minutes (mn), or At to input a specific time on the clock.
  6. Clicking on the Stop check box will provide the option of when to stop the action. Select no stop if the action doesn't require one, or you don't wish to stop it. Select for if you want to set the duration in seconds or minutes, or select until if you need to specify a specific time for the action to stop.
 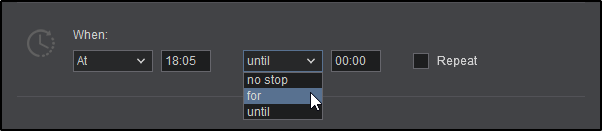 7. Clicking on the Repeat check box will provide the option of when or if to repeat the action. Input the time interval between actions (every), and the duration (for) if the action is to be repeated.
  8. Once the steps are completed, you can give the event a custom name and click the Save button. If no name is selected, VirtualDJ will name it based on the action automatically.
  9. Once saved, the created event will appear in the Event Scheduler. Continue adding events by clicking on the button.
 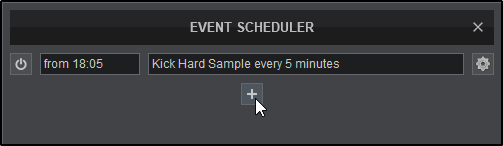 10. When you have completed scheduling events, you can name the event schedule and save it for future use by clicking on the save icon.
To create another event, click on the X icon to clear the list and begin the process again. Each event will appear in the drop down menu to be recalled at a later time or deleted using the trash can icon.