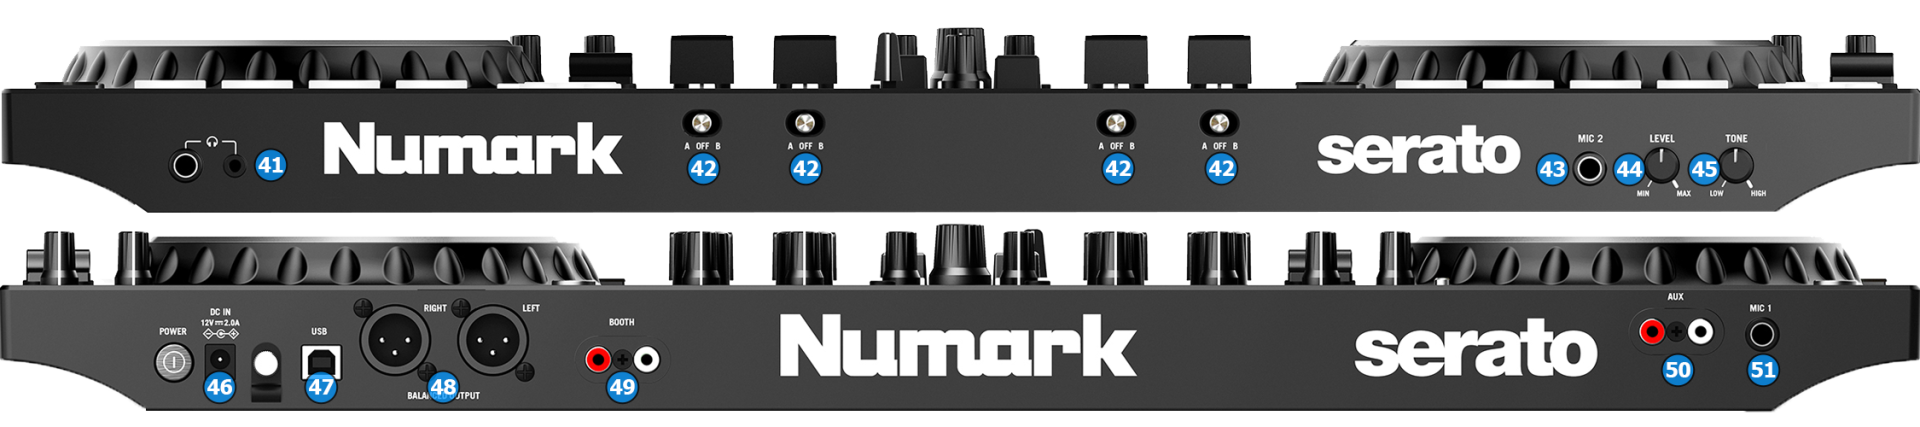
41 HEADPHONES SOCKETConnect your Headphones using a 1/4" or/and a 1/8" cable or adapter. The Volume of the Headphones channel is controlled from the top panel of the unit42 CROSSFADER ASSIGNAssign each deck to the left (A) or the right (B) side of the crossfader. Put the switcher on the middle position (Off) if you want to disable the crossfader for one or more decks43 MIC2 INPUTConnect a Microphone * using a 1/4" cable or adapter.44 MIC2 LEVELControl the volume of MIC2 input45 MIC2 TONEApply a simple single band EQ on MIC2 input46 POWERConnect the provided PSU and press the POWER button to turn on the unit47 USBConnect the NS4FX with a USB port of your computer, using the provided USB cable48 MASTER OUTPUTConnect your amplifier or amplified speakers using proper XLR cables. The Level of this Output is controlled from the top panel of the unit49 BOOTH OUTPUTConnect a second amplifier or another set of amplified speakers using proper RCA cables. The Level of this Output is controlled from the top panel of the unit43 AUX INPUTConnect a device that provides "Line level" audio signal. The Level of this Input is controlled from the top panel of the unit43 MIC1 INPUTConnect a Microphone * using a 1/4" cable or adapter. The Level of this Input is controlled from the top panel of the unit
* Note : The Microphone Inputs along with the AUX input are directly routed to the Master Output of the NS4FX. The inputs are not available in the USB Audio Interface, therefore they cannot be included in the Audio Setup nor can be recorded directly. However, recording your mix along with the Microphone Input is possible via Record LoopBack
For further Technical features and specifications, visit